Firstly, thanks so much to everyone for the lovely comments about my map cabinet makeover. I was seriously surprised and overwhelmed - you guys are just the best.
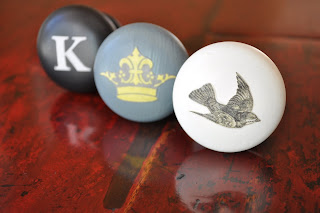
There was a lot of interest in the compass knobs I created and some of you wanted to see a more in-depth tutorial on how to make them, so here goes...
You will need:
Plain Timber Knob/s
Image/s to Apply
Printer and Standard Paper
Spray or Craft Paint
Clear Matte Spray Sealer
Scissors or a Craft Knife
Paint Brush
Adhesive
(such as PVA, Craft Glue or Mod Podge)
1. Using your computer, create or find an image you'd like to use and scale it to an appropriate size for your knob.
2. Print out your image onto regular copy paper.
3. Colour match the background of your image then paint your knob to co-ordinate.
4. Lightly spray your image with clear matte sealer. Allow to dry and then repeat the process.
This gives your image a protective coating and stiffens it slightly to help prevent ink run and paper bubbling during the gluing process.
5. Once completely dry, cut closely around your image using sharp scissors or a craft knife.
6. Apply a thin coat of adhesive to your knob using a paint brush.
7. While the glue is still wet, position your image in place. Press down firmly and smooth it all over, paying special attention to any edges.
8. Once dry, give your knob two or three coats of clear spray sealer.
For extra protection I like to finish with a few coats of brushed-on clear acrylic poly too.
9. Fini! Admire your new custom knobs (oh yeah, and find some furniture to put them on!).
Too easy!


Yorum Gönder